After years of experience with Linux + KVM, a very reliably solution, the next step seems to implement high availability (HA), which basically has the following advantages:
- Multiple nodes are accumulated to one cluster, which share storage that holds all VM data
- Virtual machines (VM) on these nodes can be migrated from one node to another in real time. This way nodes can be freed of VMs in order to reboot them / maintain etc. without disrupting services which is a huge advantage.
- If one node dies (e.g. in case of a hardware failure), another node starts the VM, so the downtime is minimized.
Although this sounds great, there are several pitfalls, especially:
- HA is complex: When a node goes down, others need to provide the lost service, e.g. start the lost virtual machine. However, how is this handled? How do the remaining nodes really know that the service (the VM) is down? Several strategies exist to this problem, such as “quorum”.
- If accidentally two nodes run the same VM, the result is disastreous – this must never happen. There are several strategies to prevent this, such as “fencing”.
- The backbone of handling the above is the network connection – if it goes down (e.g. a switch failure), the nodes seem to be dead from the perspective of each node and the result is turmoil. In order to never let this scenario happen, redundancy of network connections is vital, which however means that HA systems need at least 2, or 4, sometimes even 6 or more network adapters.
Although all software exists to set up such a HA cluster, it is quite complex. So, the idea is to use some Linux distribution which already implements all needed services to build a reliable and stable HA cluster. Proxmox VE, an open source project, seems to offer just that. After some research, Proxmox has the following corner stones:
- A Debian-based distribution (very nice!) with an additional Proxmox repository which contains all needed packages and integrates them
- Provides KVM virtualization as well as OpenVZ (and now LXC)
- Simple installation via a CD ISO and a web frontend for easy maintainance of the cluster and virtual machines
- approx. 65.000 worldwide installations, on the market since approx. 2008, a stable community
- Proxmox is an Austrian company (which I like as I’m located nearby)
- Everything is open source
- A free community version and some subscription plans for support and a “stable” repository for mission-critical systems, which is o.k. to my mind. (However, what I find a bit unfortunate is the lack of information about the differences between the subscription-based “stable” repository and the free one and how this is planned in the future).
- Integration of the “ceph” distributed filesystem
So, all in all, Proxmox seems like a very good and stable choice.
The hardware to be used for my test system is a 4-node Supermicro Node server, whereas 3 nodes will currently be used:

- Enough computing power
- 2 gigabit ethernet interfaces / node, which is a bit sparse but should suffice for testing
- An infiniband interface – maybe this can be put to some use?
- Each node has an SSD disk for the Proxmox system and local storage
- Each node has 2 * 2TB SATA disks in order to create a ceph storage over 3*2=6 disks
In order to get used to proxmox, I order the following book: Mastering Proxmox
By time of this writing, Proxmox provides a new beta version, Proxomox 4 beta 1, which is not yet fully stable but provides quite some advantages, especially:
- based on the new Debian Jessie, along with a newer Linux kernel, a newer QEMU
- a new HA manager, whereas setup is simplifiedLXC instead of openvz (which I don’t plan to use)
- An easy upgrade path to Proxmox 4.0 stable which should be released somewhere in the near future
So, it seems only logical to start right away with Proxmox 4 in order to use the newest technology right away, moreover, it can be expected that 4.0 stable will follow some time soon and older concepts from previous versions don’t have to be dealt with. I also learned that Proxmox 4 uses corosync 2.0, a key component, whereas Proxmox < 4 uses corosync 1.0, which is not compatible.
So upgrading from Proxmox
So – let’s start!
First of all the ISO image was downloaded and the installation disk was mounted via IPMI / virtual media in order to boot it. This worked, however, to some unknown reason the data transfer of the virtual media is VERY slow, so installation takes quite a long time.
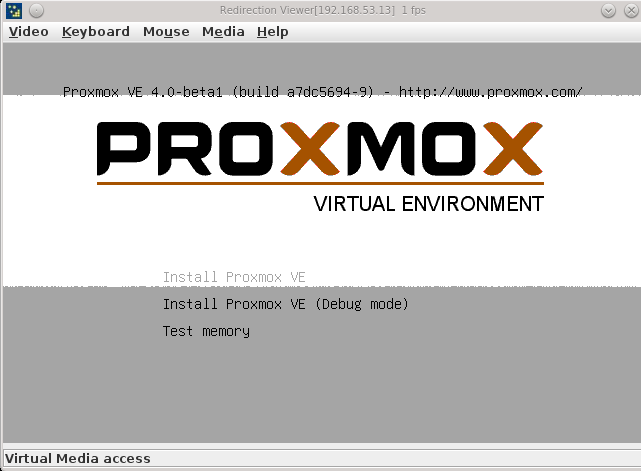
The installer is graphical, there is no text install. Although this looks nice, it has several disadvantages:
- The transfer of the GUI data is quite slow over the Java-based virtual console
- Mouse handling was problematic in my case, mouse clicks were not recognized, so I was stuck at the following screen as I could not access the “I agree” button. Keyboard commands like the “TAB” key seem not to work here, so if the mouse does not work, you are stuck, whereas I’m not the only one, it seems

- I managed to pass the screen (don’t know how), however, the mouse click was applied to the next screen too, so I was not able to configure the local disk layout and some default layout was chosen. Later on I learned that the “Mouse Mode” has to be set to “relative” in order to work. Moreover, the following key combination can be used to advance to the next screen: “ALT+g” (and if you press “ALT”, one can see the underlined “g”…)
- The layout can be adapted to your needs, after that you need to enter some localization and network addresses, then the installation starts right away:
In case you are interested, the default layout looks like the following (on my 120GB SSD, don’t know if it is different for other disk sizes):
- Linux LVM
- Root: 28GB
- Swap: 13GB (for 24GB RAM on my machine)
- Data (for LXC and KVM containers / local storage): 56GB, mounted on /var/lib/vz -> So this is where your local storage is situated!
- Unallocated / Free: 13GB
- Ext4 filesystem
The layout makes sense, although I personally find that the default root size is too big – after installation only 1.7 of the available 28GB were used.
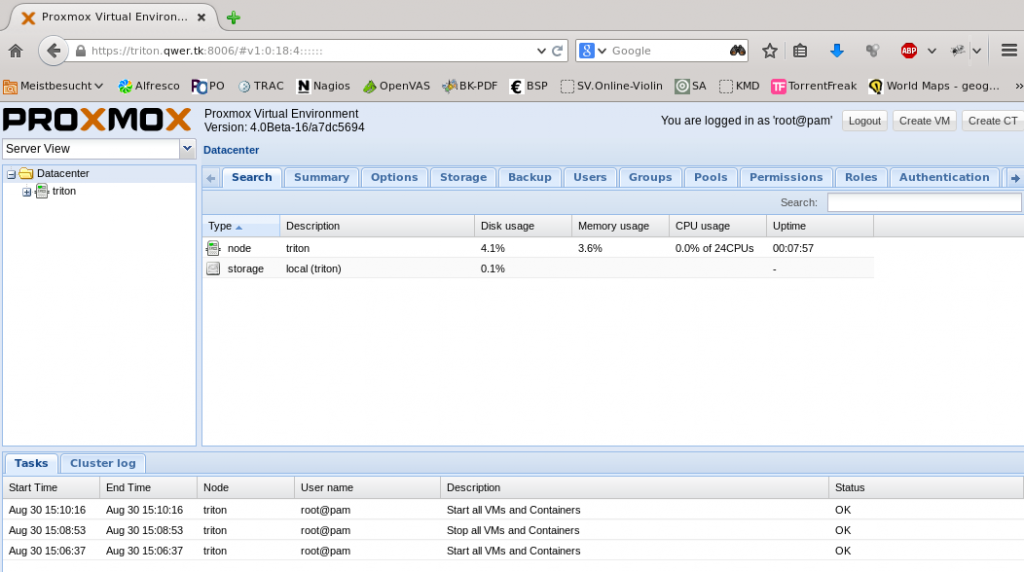
After installing the system, a nice GUI is displayed when accessing it via the web browser:
So, the next steps are the following:
- Create the cluster with “pvmcm create”
- Add the two other nodes
Creating the cluster could easily be done as described in the book. However, the output of the command line tool is very different but understandable.
Adding nodes should be simple, too but unfortunately it was not:
- “pvmcm add” exited with the message “unable to copy ssh id”. I learned that this may happen if the “master node” has no quorum, however, “pvecm status” reported that it had. Nevertheless, the ssh configuration file, “authorized_hosts” was set to readonly, so no wonder the node could not be added. The solution was to reboot the master node, no clue why.
- When adding the second node, it first seemed to work at first, but then it got stuck when it tried to aquire quorum:
Although waiting for an hour or so, it never advanced, so I stopped this with CTRL+C.
The third node could be added as expected, so I still have no clue what went wrong at this stage. However, this was the point from where things got bad:
- Trying to re-add the node was impossible, it told me “authentication key already exists”.
- The dysfunctional node showed up in the web front end, so I tried to remove it from the cluster with “pvecm delnode”, which was probably not a good idea as deleting a node has to be done following certain steps as described here.
- If this removal is not done properly, the document states: “ATTENTION: as said above, it is very important to power off the node before removal, and make sure that it will not power on again (in the network) as it is. If you power on the node as it is, your cluster will be screwed up and it could be difficult to restore a clean cluster state.”
- Well, it seems that the failed adding of the node just did that and thus the cluster was unclean.
I personally did not want to reinstall all nodes as installation over virtual media takes hours, so I tried to remove certain debian packages, delete configuration files and reinstall them, but I was not successful. So, all in all this looked like a complete, fresh install of the whole cluster, moreover, before doing so the following pages seem to be a good read so that I will understand things better when they go wrong next time:
- Some wiki pages of Proxmox 4:
Proxmox 4.x Cluster, Proxmox Cluster file system (pmxcfs), High Availability Cluster 4.x - After this read a lot will still be unclear, so the next good read seems to be corosync, the base of pmxcfs:
Pacemaker 1.1 – Clusters from Scratch and Pacemaker 1.1 – Configuration Explained
So, I’ll finish this blog post for now and continue it in another post when I studied the above more in-depth. My personal findings at his stage are, however, the following:
- Despite the installation disaster, I still like the concept of Proxmox, it seems to integrate existing technology quite nicely and the web frontend is very nice and handy.
- There is lack of information / documentation: The information in the wiki is quite sparse and lacks description of the concept, the “overall picture”, how everything integrates. However, knowledge seems to be vital as can be seen in my described experiences above. Without understanding pmxfs, cronosync etc., one will get stuck very quickly.
- I personally miss a text install which I always prefer when installing server software
- Deleting a node should be simpler: I don’t like the idea that an unclean removal of a node may destroy my whole cluster database, at least there should be a documented and viable path to repair it, to bring it back to a consistent state.
- Resetting a node to a clean state should be simpler, too. It should not happen that a bug in the add routine of a node leads to the necessity to install the whole cluster from start. (However, I’ll dig into this, maybe the corosync documentation has some clues how to do this).
- The book “Mastering Proxmox” is nice, but lacks the upcoming technology – it concentrates on Proxmox 3 but the upcoming release (Proxmox 4) is not taken into account: The output of tools (e.g. pvmcm) differs a lot, the configuration files seem to have changed (e.g. no “cluster.conf” any more), so the book is already outdated to some degree, which is a pity. An appendix such as “Outlook to Proxmox 4” would have been a good addition. Nevertheless it is a nice introduction to Proxmox, I like the networking section and the introduction to ceph (although I could not yet test it).
- It is unfortunate that the ceph integration is not functional (for now) in Proxmox beta 4 – however, this will probably change.
- Proxmox beta 4 seems a step forward to me but still has some bugs that have to be sorted out.
So, all in all I still think Proxmox is the way to go, however, one should really dig into documentation before trying to install a cluster – and the book “Mastering Proxmox” is certainly not sufficient.